highway032
Shading method for peanut-shaped faces for beginners
2024.04.28 23:47
Peanut Face Shading Method

When doing makeup
At first, I just went around playing bass, but
If you try to copy makeup that makes you look pretty
As I started using blush, contouring, and highlighter as well
I want to bring out the three-dimensional effect of the face.

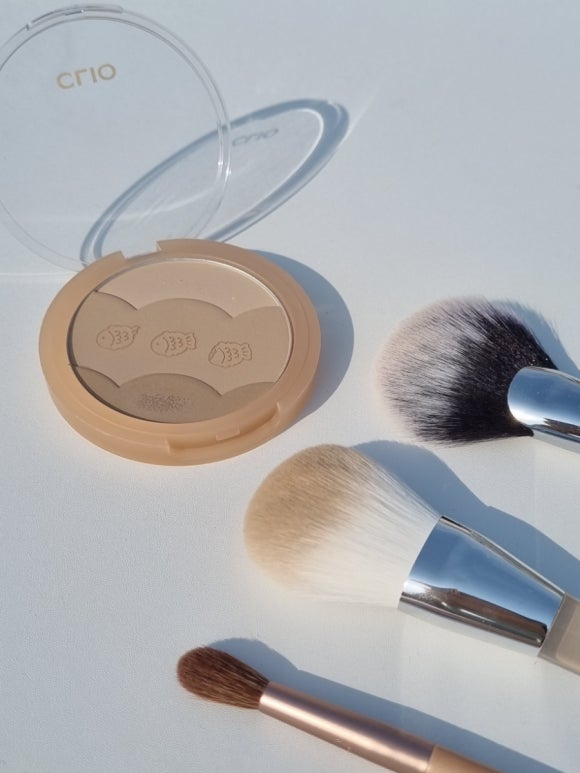
Source | Club Clio Official Mall
As for shading, it depends on the face shape
It's difficult because the roles I have to play are different.
Especially #PeanutFace same #Angular face silver
Since it is harder to find a suitable location or range
When you do it for the first time, sometimes what you did ends up looking stranger.
I feel like I'm getting even more lost on what to do.

I tend to have prominent cheekbones, too.
The jaw is also developed
While making the face look longer
The ball is sunken
The ball sinks right in
It was so hard to do contouring because my face is peanut-shaped.
So today, I'm going to explain how to contour a peanut-shaped face.
I'm going to share this.
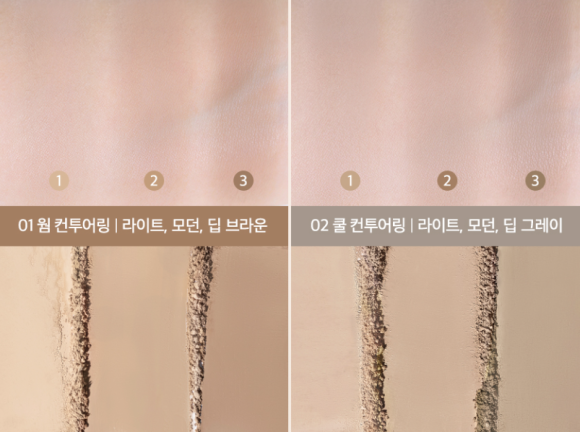
Step 1 | Finding the Right Shading Color for You

Source | Too Cool for School Official Mall
First of all, finding the shading color that suits me is
I think that's the most important thing.
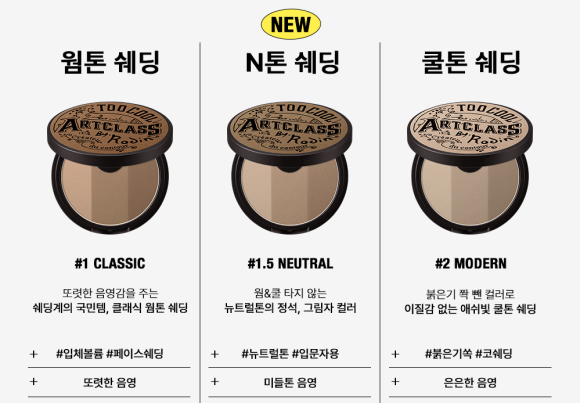
These days, we are moving away from warm and cool tones.
The shading colors come in a wide variety, including neutral tones.
When choosing a color
It is good to choose one that matches my tone, but
I think it would be better if you purchased one that matches the base I am currently using.

Source | Club Clio Official Mall
I have a warm skin tone, but
I mainly use cool-toned colors for shading.
The bass I use
Even if you have a warm undertone, if it is a base that gives a bright, radiant, and clear look
The warm-toned shading color feels yellow to me.
Rather than a natural shadow feel
It seems to look unnatural because the shading color stands out.
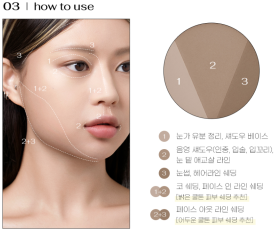

And when using it on your face
You may use the colors according to the guide for the product you purchased, but
I actually swatched the colors and
What color, what combination
If you check if it looks natural on my face
You can make it more natural.
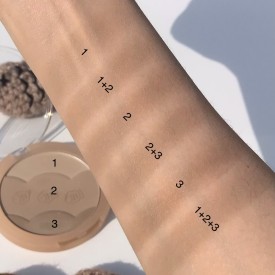
On the arm or face
Apply your foundation first.
I also tried swatching each color individually.
Even when mixing colors, each one develops its own color.
I think it would be good to compare it to the shadows falling on my face.
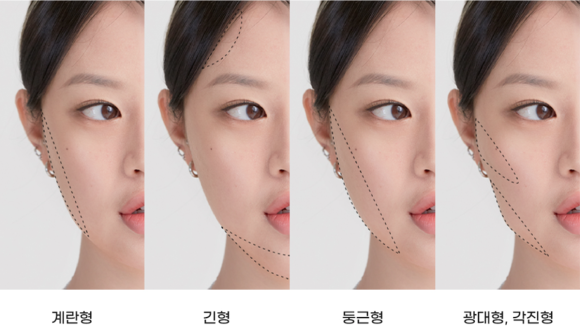
Step 2 | Finding the Shading Zone on a Peanut Face
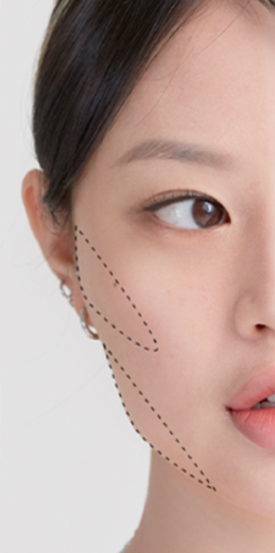
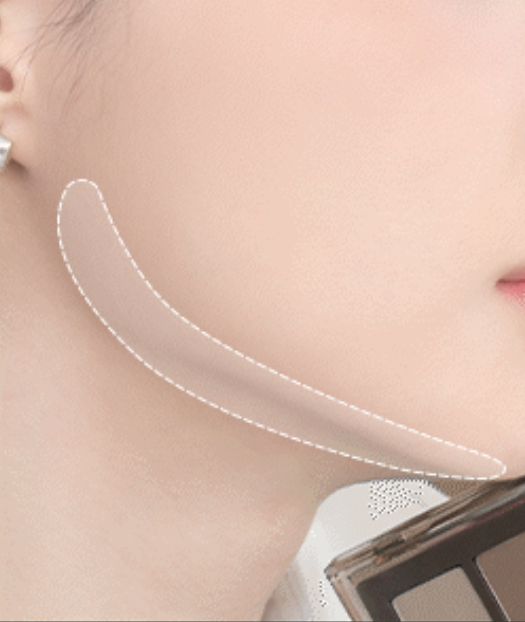

(Left) Source | Club Clio Official Mall
A peanut-shaped face is a face shape with developed cheekbones and jaw.
I need to apply shading to the cheekbones and jawline.
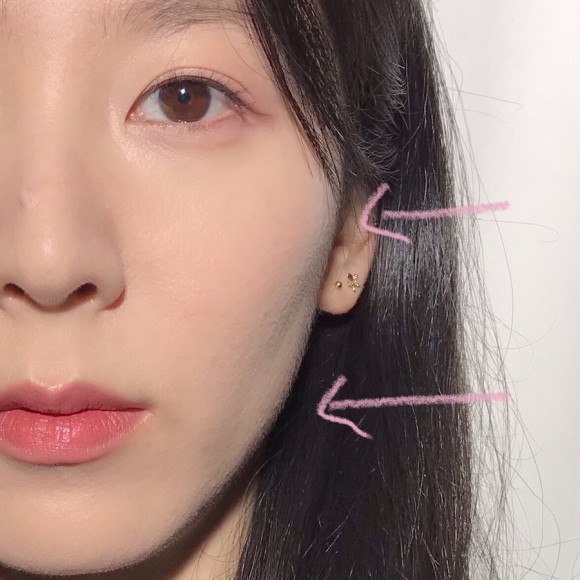
The important thing is that the ball is turned off.
Make sure the shading does not go onto the cheek area.
I think it's difficult because you have to adjust it carefully.


When shading, rather than looking at the side
I recommend doing it while looking straight ahead.
Looking straight ahead, the part where the jaw stands out
With a sweeping motion from the outside in.
You just need to apply it little by little.
And naturally
Please connect it all the way to the chin.


Source | Romand Official Mall
If you have a long face shape, the bridge of the nose is...
When shading, apply to the inner corners of the eyes, the bridge of the nose, and the sides of the nose.
If you do it in chunks...
The length doesn't connect all at once, so
It seems to make me look less tall.
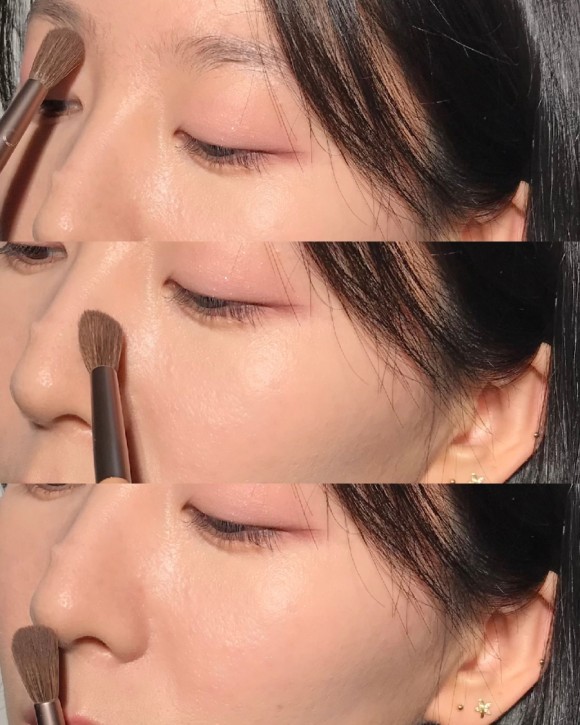

In the case of nose shading
If it is difficult to do the eye socket area
Turn to the side
along the visible shaded area
Before the bridge of the nose begins
Shade the curved parts
Gently stroke the bridge of the nose
Hold the brush upright on the tip of the nose
If you sweep it
I think the tip of the nose might look a little short.

If you do the shading like this
The tip of the nose while living
It seems like it can smoothly shape the contours of the face.
https://m.blog.naver.com/hi2_9sol/223430097140
1
0
Comments4